How a precast concrete fence is installed — step by step
Installing a precast concrete fence — from the quote to the last panel: the foundation sizes, what the assembly crew does and what is needed from you. Water and power are needed; if there is no power, we bring a generator. You do not need to be on site.
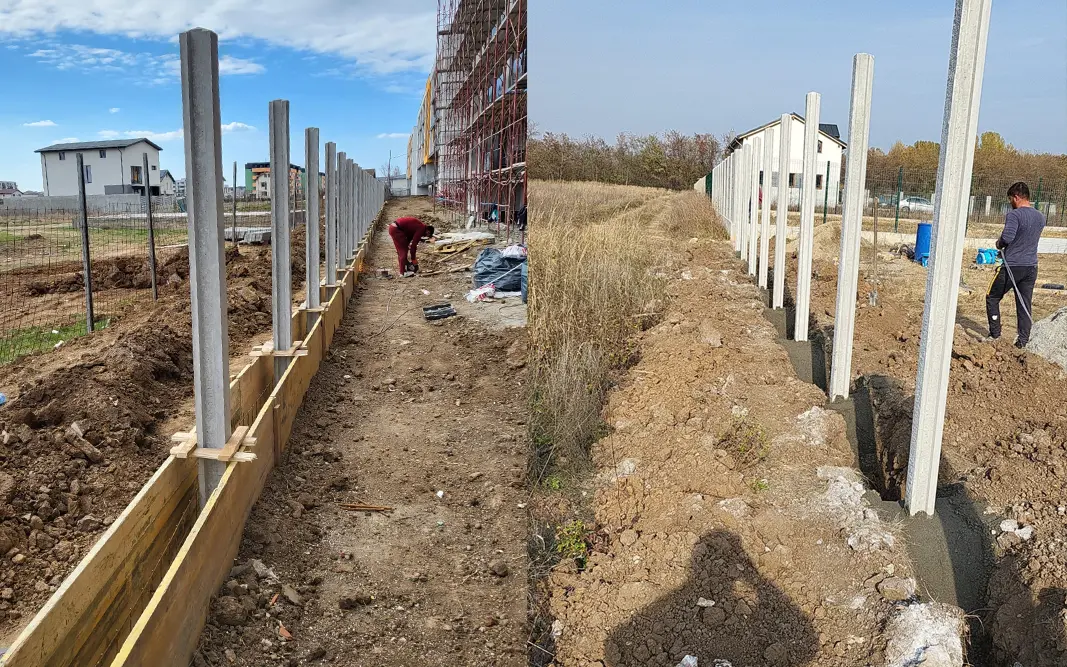
Installing a precast concrete fence starts below ground: the posts are set in concrete in single foundations (footings) of 40 × 40 × 80 cm, and the first row of panels is sunk 5–10 cm into the ground. What is needed from you: access for the truck, water, power and a cleared strip along the fence line.
1. A quote before anything else
First we need a few details about the property: how many linear metres the fence is, how high it should be, whether there is a level difference between the yard and the street, and how many gates there will be and of what type. With these we prepare a quote for the elements and transport — usually within 4 working hours. If you also want installation, once you confirm the quote we prepare a second one — for installation, according to the site.
The model is chosen now. The prices of all models are per linear metre and depend on the model, the height (150, 180 or 210 cm for most models) and the colour — standard grey or premium white.
2. What is needed from you on site
Four things are needed on site:
- Access to the site for the truck and for unloading. For most models the panel is 183 × 30 × 4–5 cm (thickness depending on the relief) and weighs 46–61 kg. For Douglas and Cedar the panel is 200 × 40 × 4–5 cm and weighs 77 kg, for Stacked Stone — 200 × 50 × 4–5 cm and 82 kg. It is not something you carry by hand across the whole yard.
- Water for mixing the concrete on site.
- Power. If there is no electricity on site, that is not an obstacle — a generator can be used.
- A cleared strip along the fence line.
You do not need to be present
Many of our clients work or live in another town. Once the fence line, the height and the access have been agreed, the crew works on its own — your presence on site is not required.
Request a quote Send us the length and height — the quote is usually ready within 4 working hours.
3. Choosing the foundation: two options
A precast fence is installed in two ways — on single concrete foundations for each post, or on single foundations connected by a continuous plinth.
Option 1 — single foundations
The posts are set in concrete in separate foundations of approximately 40 × 40 × 80 cm. We recommend that the foundations be fully buried in the ground and the first row of panels partly sunk to a depth of 5 to 10 cm.
This option is cheaper, faster and invisible: the footings stay below ground.
Option 2 — strip plinth
The single foundations are connected by a continuous reinforced-concrete plinth of approximately 20 × 70 cm. It is used on more difficult ground — unstable soil, a large level difference between the yard and the street, strong wind. It costs more than single foundations.
The dimensions are not fixed: they change according to the soil structure, the weight of the fence, the level difference and the wind load.
4. Preparing for metal gates — at the foundation stage
If there will be gates, their positions are prepared together with the foundation: the metal supporting posts and the reinforced-concrete beam across the full width of the opening. Once the fence is up, the same work is harder and more expensive. For now, we make and deliver gates only in Bulgaria, to the size of the opening and without installation — we are working on a solution for on-site installation, so this preparation is up to you.
5. Installing the posts and panels
Standard posts are 285 cm long, of which 80 cm stay in the ground; together with the first row of panels sunk 5–10 cm, they are sufficient for fences up to 210 cm. For a higher fence, reinforced posts 310 cm long are used.
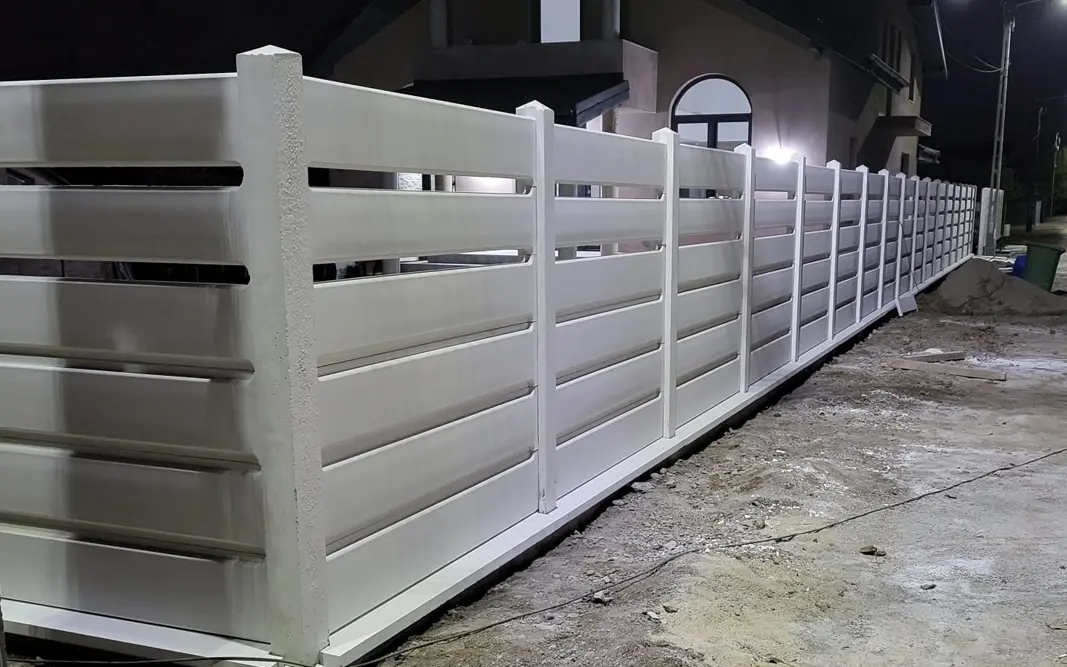
The panels are stacked one on top of another in the grooves of the posts — without mortar and without additional bracing.
6. The back of the fence and finishing
The back of the fence is unfinished — no relief and no finishing treatment. If you want it to be smooth on the yard side as well, the back is skimmed with adhesive and fibreglass mesh. This can be done at any time after installation — it does not have to be straight away.
Important for the warranty: it applies provided the fence is not treated with unsuitable materials — for example oils or cement in the joints. The full terms and exclusions are described in the warranty card.
7. Timeframes and installation in winter
The installation itself of a typical fence — a few dozen to about 100 linear metres — takes 2–3 days on prepared ground with the materials delivered; for longer fences the timeframe is stated in the quote.
Production runs all year round — our three halls are enclosed. We install at temperatures above −5 °C and on snow-free ground, and in the coldest weeks of January and February we pause.
8. Documents and payment
- a deposit of at least 20%, the balance — before each delivery, according to its value, less the proportional part of the deposit paid;
- a warranty card and a certificate of conformity with every fence;
- a 15-year warranty on all fences, including the industrial offer;
- a service life of over 50 years; the fence requires practically no maintenance — no painting and no anti-corrosion treatment.
What the cost of the assembly itself depends on: access to the site, the height of the fence (the number of rows of panels), the dimensions of the footings and/or the plinth, the soil structure, the availability of water and electricity, local material prices and the urgency of the order.
You will find illustrations of the two foundation options on the fence assembly page, and completed projects in the gallery.
Next step
Send us the length of the fence, the desired height and a few photos of the site via the contact form.